1. Open Start, do a search for Task Scheduler, and press Enter.
2. Right-click Task Scheduler Library and click New Folder.
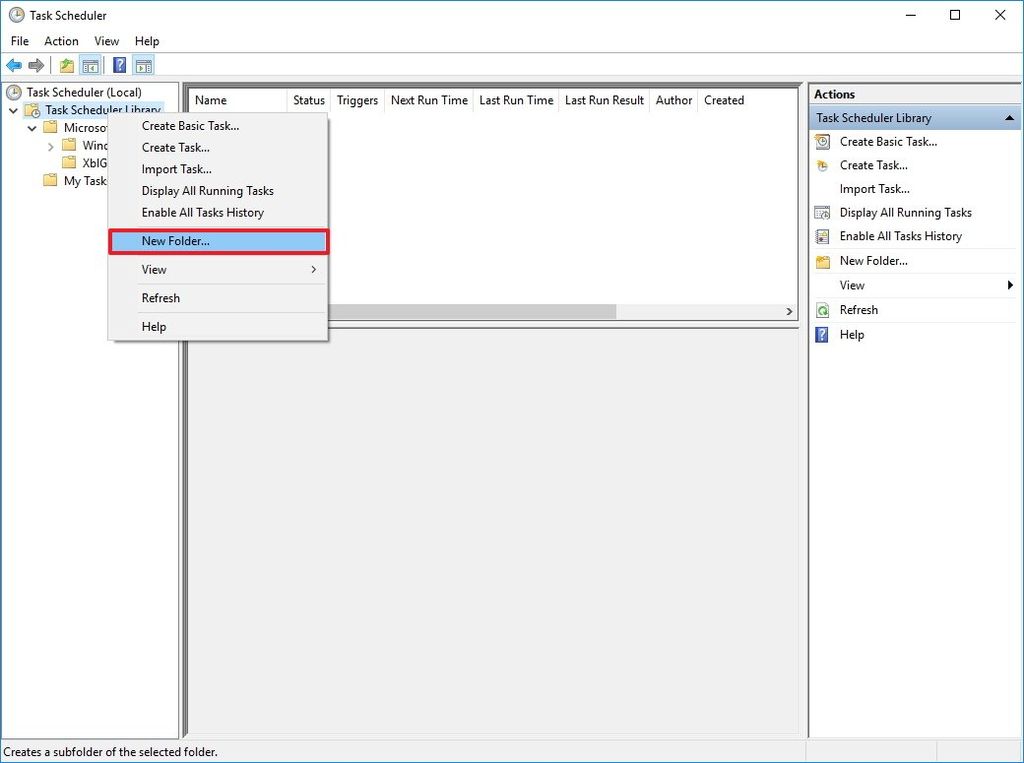
3. Name the folder My Tasks or anything descriptive. (You want to do this to keep your tasks organized and separated from the system tasks.)
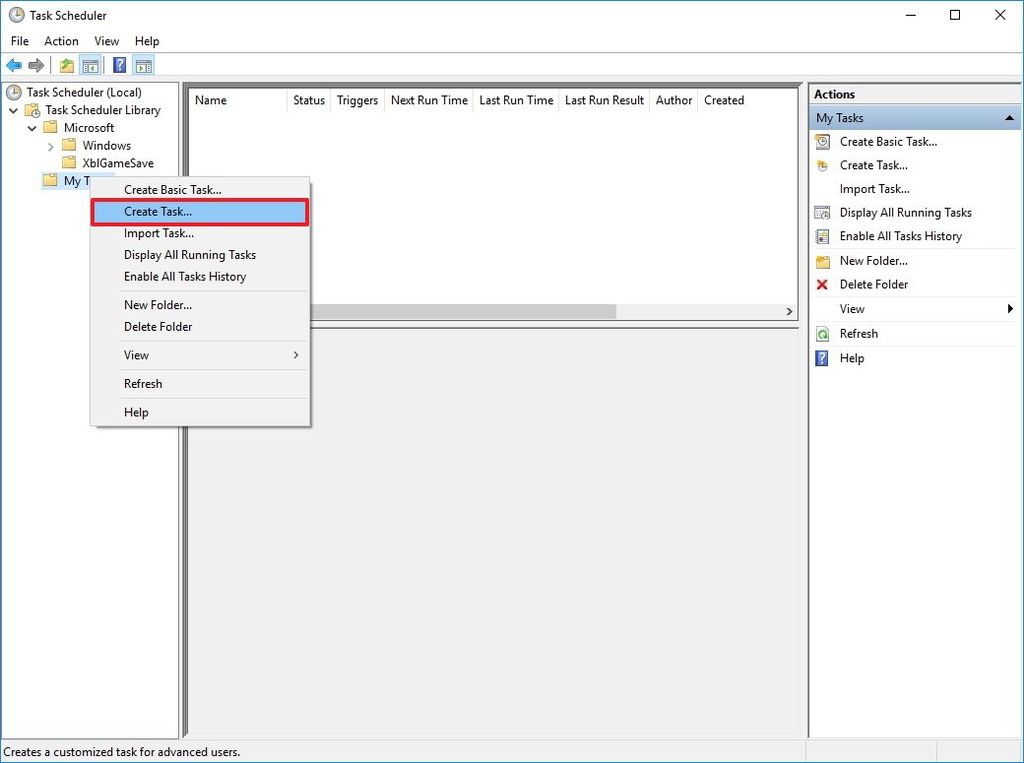
4. Right-click the newly created folder and select Create task.
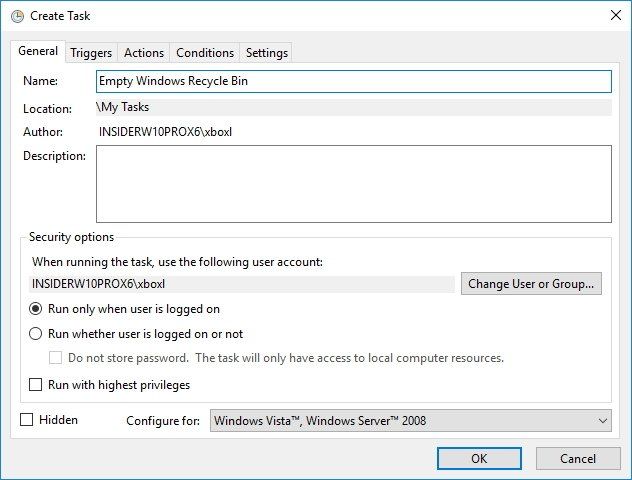
5. On the General tab, enter a name for the task, such as Empty Windows Recycle Bin.
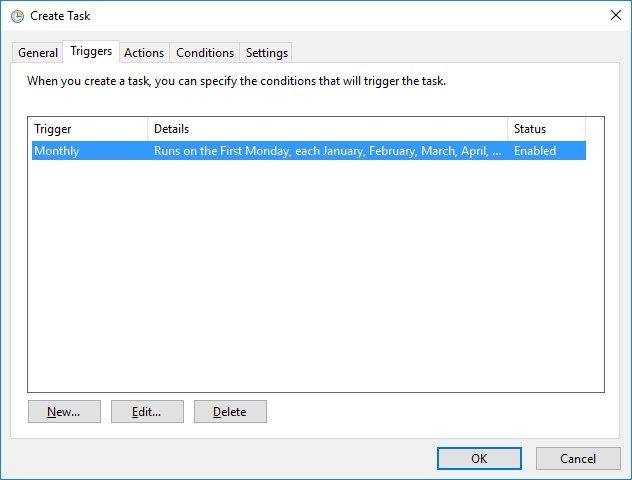
6. On the Triggers tab, click New to create an action that will trigger the task.
[Read more…]
Friday, December 1, 2023
ວິທີການລ້າງຖັງຂີ້ເຫຍື້ອໂດຍອັດຕະໂນມັດຕາມກໍານົດເວລາ ໃນ Windows 10
Monday, June 12, 2023
Fail2Ban CloudFlare action using Authorization Bearer Token
THE NEW ACTIONBAN COMMAND
The new actionban command for CloudFlare IP address blocking is as follows…
actionban = curl -s -X POST https://api.cloudflare.com/client/v4/user/firewall/access_rules/rules
	-H "Authorization: Bearer <cfkey>" -H "Content-Type: application/json"
	--data '{"mode":"block","configuration":{"target":"ip","value":"<ip>"},"notes":"Banned by Fail2Ban"}'
THE NEW ACTIONUNBAN COMMAND
[Read more…]
Thursday, June 8, 2023
How to block 404 attacks using fail2ban
Add the following new file named nginx-4xx.conf to /etc/fail2ban/filter.d/
[Definition]
failregex = ^<HOST>.*"(GET|POST).*" (404|444|403|400) .*$
ignoreregex =
Now, open /etc/fail2ban/jail.conf and add the following block of code to the end of the file.
[nginx-4xx]
enabled = true
port = http,https
filter = nginx-4xx
logpath = /var/log/nginx/access.log
bantime = 1800
findtime = 60
maxretry = 5
Friday, September 16, 2022
ຕິດຕັ້ງ ເມວເຊີເວີ ດ້ວຍໃຊ້ iredmail ໃນ Ubuntu 20.04
ມີຂັນຕອນດັ່ງນີ້:
1.
apt-get update -y
2.
hostnamectl set-hostname mail.websitefortesting.com
3.
vim /etc/hosts
45.56.112.153 mail.websitefortesting.com mail
4.
wget https://github.com/iredmail/iRedMail/archive/1.4.0.tar.gz
5.
tar -xvzf 1.4.0.tar.gz
6.
cd iRedMail-1.4.0
chmod +x iRedMail.sh
./iRedMail.sh
7.
yes, next, ngixn next, [mariadb] next, [put domain next, [passwd] next, select the component and click Next
8.
y, y
9.
reboot now
ຕິດຕັ້ງ CSF Firewall ໃນ Ubuntu 20.04
ປະຕິບັດຕາມຂັ້ນຕອນດັ່ງນີ້
Install CSF
1.
apt-get update -y
2.
apt-get install sendmail dnsutils unzip git perl iptables libio-socket-ssl-perl libcrypt-ssleay-perl
libnet-libidn-perl libio-socket-inet6-perl libsocket6-perl -y
3.
wget http://download.configserver.com/csf.tgz
4.
tar -xvzf csf.tgz
5.
cd csf
bash install.sh
6.
perl /usr/local/csf/bin/csftest.pl
Configure CSF
7.
nano /etc/csf/csf.conf
Wednesday, July 14, 2021
How to install Adminer on Ubuntu 18.04
Adminer is available for install from Ubuntu Repositories using “sudo apt-get install adminer” but to get the latest features we will install the latest version manually.
This Tutorial should work on Ubuntu 16.04 and 18.04
This tutorial is For Adminer and MYSQL but Adminer also works with the following databases:
MySQL
PostgreSQL
SQLite
MS SQL
Oracle
SimpleDB
Elasticsearch
MongoDB
Step 1
sudo mkdir /usr/share/adminer
Step 2
sudo wget "http://www.adminer.org/latest.php" -O /usr/share/adminer/latest.php
Wednesday, February 17, 2021
How to Install Let’s Encrypt on Ubuntu 20.04 with Apache
Let’s start with the installation – it is a simple installation and will not take long.
Prerequisites
For the purposes of this tutorial, we will use an Ubuntu 20.04 VPS.
User with sudo privileges or full SSH root access is required. All of our VPSes come with root access.
A valid domain name pointed to your server’s IP address. In this tutorial, we will use domain.com as an example.
1. Install Certbot
As mentioned earlier, we will be using Certbot so that we can get a free SSL certificate from Let’s Encrypt. To install this useful tool, we need to enable the universe repository:
sudo apt install software-properties-common
sudo add-repository universe
sudo apt update
Run this command on the command line on the machine to install Certbot.
sudo apt install certbot python3-certbot-apache
2. Generate a Free Let’s Encrypt SSL Certificate
There are many ways to obtain an SSL certificate with Certbot. We will use the Apache plugin, which will take care of reconfiguring Apache’s Virtual Host and will reload the new configuration for us. You can run the following command to use the plugin:
sudo certbot --apache
Using this script, you need to answer a series of questions and provide an email address. In the first step, you need to type a valid email address. The email address is required for notifications and security notices regarding your website’s certificate:
Output:
Saving debug log to /var/log/letsencrypt/letsencrypt.log
Plugins selected: Authenticator apache, Installer apache
Enter email address (used for urgent renewal and security notices) (Enter 'c' to
cancel): [email protected]

