Wednesday, October 23, 2024
In this guide, we shall indicate two methods of upgrading a database
Method 1: Automated upgrade script. The script will handle everything for you including backups.
Using the convenience script.
wget -qO- https://raw.githubusercontent.com/dannydev77/database_upgrade_utility_script/main/database_upgrade.sh | bash
Method 2: Manual – This section provide step by step actions.
Before you begin the upgrade ensure to take a backup of your data in case something goes wrong.
Steps:
[Read more…]
Saturday, September 21, 2024
For those who have been locked out Cyberpanel due to two factor aunthentication, I have tried all methods on this forum but none worked for me when i lost my Google aunthenticator app. I hope my method works for you. Don’t get locked out of your server. Cheers!
1. Firstly, try connecting through SSH and entering the MySQL command line with these commands.
MYSQL_PWD=`cat /etc/cyberpanel/mysqlPassword` mysql -uroot
2. In order to enter the CyberPanel database, use the command:
use cyberpanel;
3. Now disable 2FA for the admin account with the following command:
UPDATE `loginSystem_administrator` SET `twoFA` = '0' WHERE `loginSystem_administrator`.`id` = 1;
[Read more…]
Sunday, September 8, 2024
Zimbra uses Nginx as its proxy, and you can configure Nginx to block direct access via the server’s IP address. Here’s how to configure it:
Edit Nginx Configuration for Web Access:
sudo nano /opt/zimbra/conf/nginx/includes/nginx.conf.web.https.default
Add Server Block to Deny IP-Based Access: Add a new server block at the top of the configuration to deny access via the server’s IP.
server {
    listen 80;
    listen 443 ssl;
    server_name <em>;  # This matches any request not using a domain name (IP-based access)
    return 444;     # Return a 444 response (which drops the connection without sending a response)
}
[Read more…]
Monday, September 2, 2024
Modify the Fail2ban Action:
[Definition]
actionban = curl -s -X POST "https://api.cloudflare.com/client/v4/zones/YOUR_ZONE_ID/firewall/access_rules/rules"
-H "X-Auth-Email: [email protected]"
-H "X-Auth-Key: your-global-api-key"
-H "Content-Type: application/json"
--data '{"mode":"block","configuration":{"target":"ip","value":"<ip>"},"notes":"Fail2ban block"}'
Fail2ban actionunban
[Definition]
actionunban = bash -c '
RULE_ID=$(curl -s -X GET "https://api.cloudflare.com/client/v4/zones/YOUR_ZONE_ID/firewall/access_rules/rules"
-H "X-Auth-Email: [email protected]"
-H "X-Auth-Key: your-global-api-key"
-H "Content-Type: application/json" | jq -r ".result[] | select(.configuration.value == "<ip>") | .id") &&
curl -s -X DELETE "https://api.cloudflare.com/client/v4/zones/YOUR_ZONE_ID/firewall/access_rules/rules/$RULE_ID"
-H "X-Auth-Email: [email protected]"
-H "X-Auth-Key: your-global-api-key"
-H "Content-Type: application/json"'
[Read more…]
Friday, August 23, 2024
When you connect to a computer (either a Windows client or Windows Server) through the Remote Desktop client, the Remote Desktop feature on your computer “hears” the connection request through a defined listening port (3389 by default). You can change that listening port on Windows computers by modifying the registry.
1. Start the registry editor. (Type regedit in the Search box.)
2. Navigate to the following registry subkey: HKEY_LOCAL_MACHINESystemCurrentControlSetControlTerminal ServerWinStationsRDP-Tcp
3. Find PortNumber
4. Click Edit > Modify, and then click Decimal.
5. Type the new port number, and then click OK.
6. Close the registry editor, and restart your computer.
The next time you connect to this computer by using the Remote Desktop connection, you must type the new port. If you’re using a firewall, make sure to configure your firewall to permit connections to the new port number.
[Read more…]
Wednesday, August 21, 2024
ສຳລັບ Windows 7, 8.1, 10
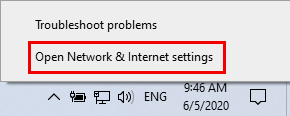
1. Right-click the network icon in the notification tray and select Open Network & Internet settings.
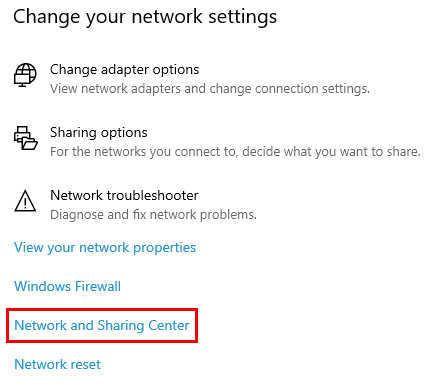
2. ເປີດ Network and Sharing Center.
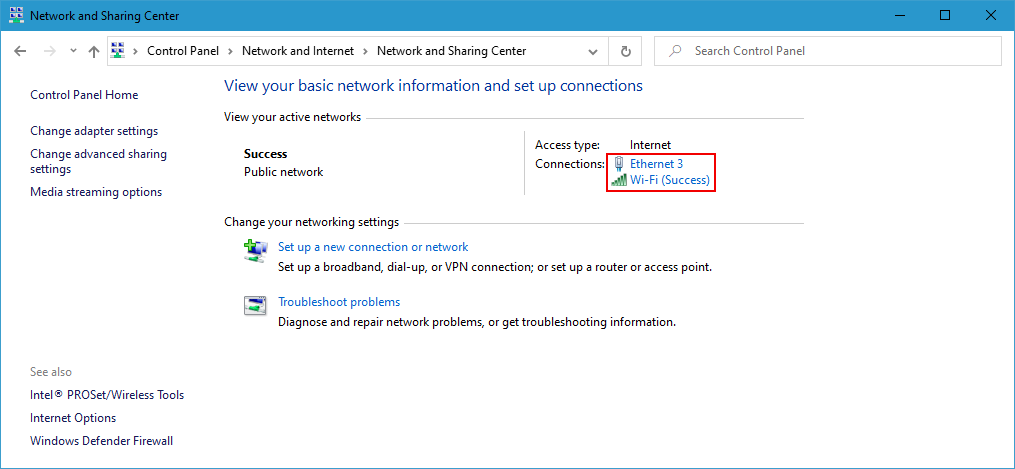
3. Click on your network adapter.
[Read more…]
Thursday, August 15, 2024
Configuring Nginx to Use your Error Pages
Now, we just need to tell Nginx that it should be utilizing these pages whenever the correct error conditions occur. Open the server block file in the /etc/nginx/sites-enabled directory that you wish to configure. We will use the default server block file called default, but you should adjust your own server blocks if you’re using a non-default file:
sudo nano /etc/nginx/sites-enabled/default
Direct 404 Errors to the Custom 404 Page
Use the error_page directive so that when a 404 error occurs (when a requested file is not found), the custom page you created is served. We will create a location block for the file, where we are able to ensure that the root matches our file system location and that the file is only accessible through internal Nginx redirects (not requestable directly by clients):
/etc/nginx/sites-enabled/default
server {
        listen 80 default_server;
        listen [::]:80 default_server ipv6only=on;

        . . .

        error_page 404 /custom_404.html;
        location = /custom_404.html {
                root /usr/share/nginx/html;
                internal;
        }
}
[Read more…]

